Blender 3D Grate/Mesh Model - Step by Step
A step by step guide to creating a 3D grate/mesh model in Blender
Tags
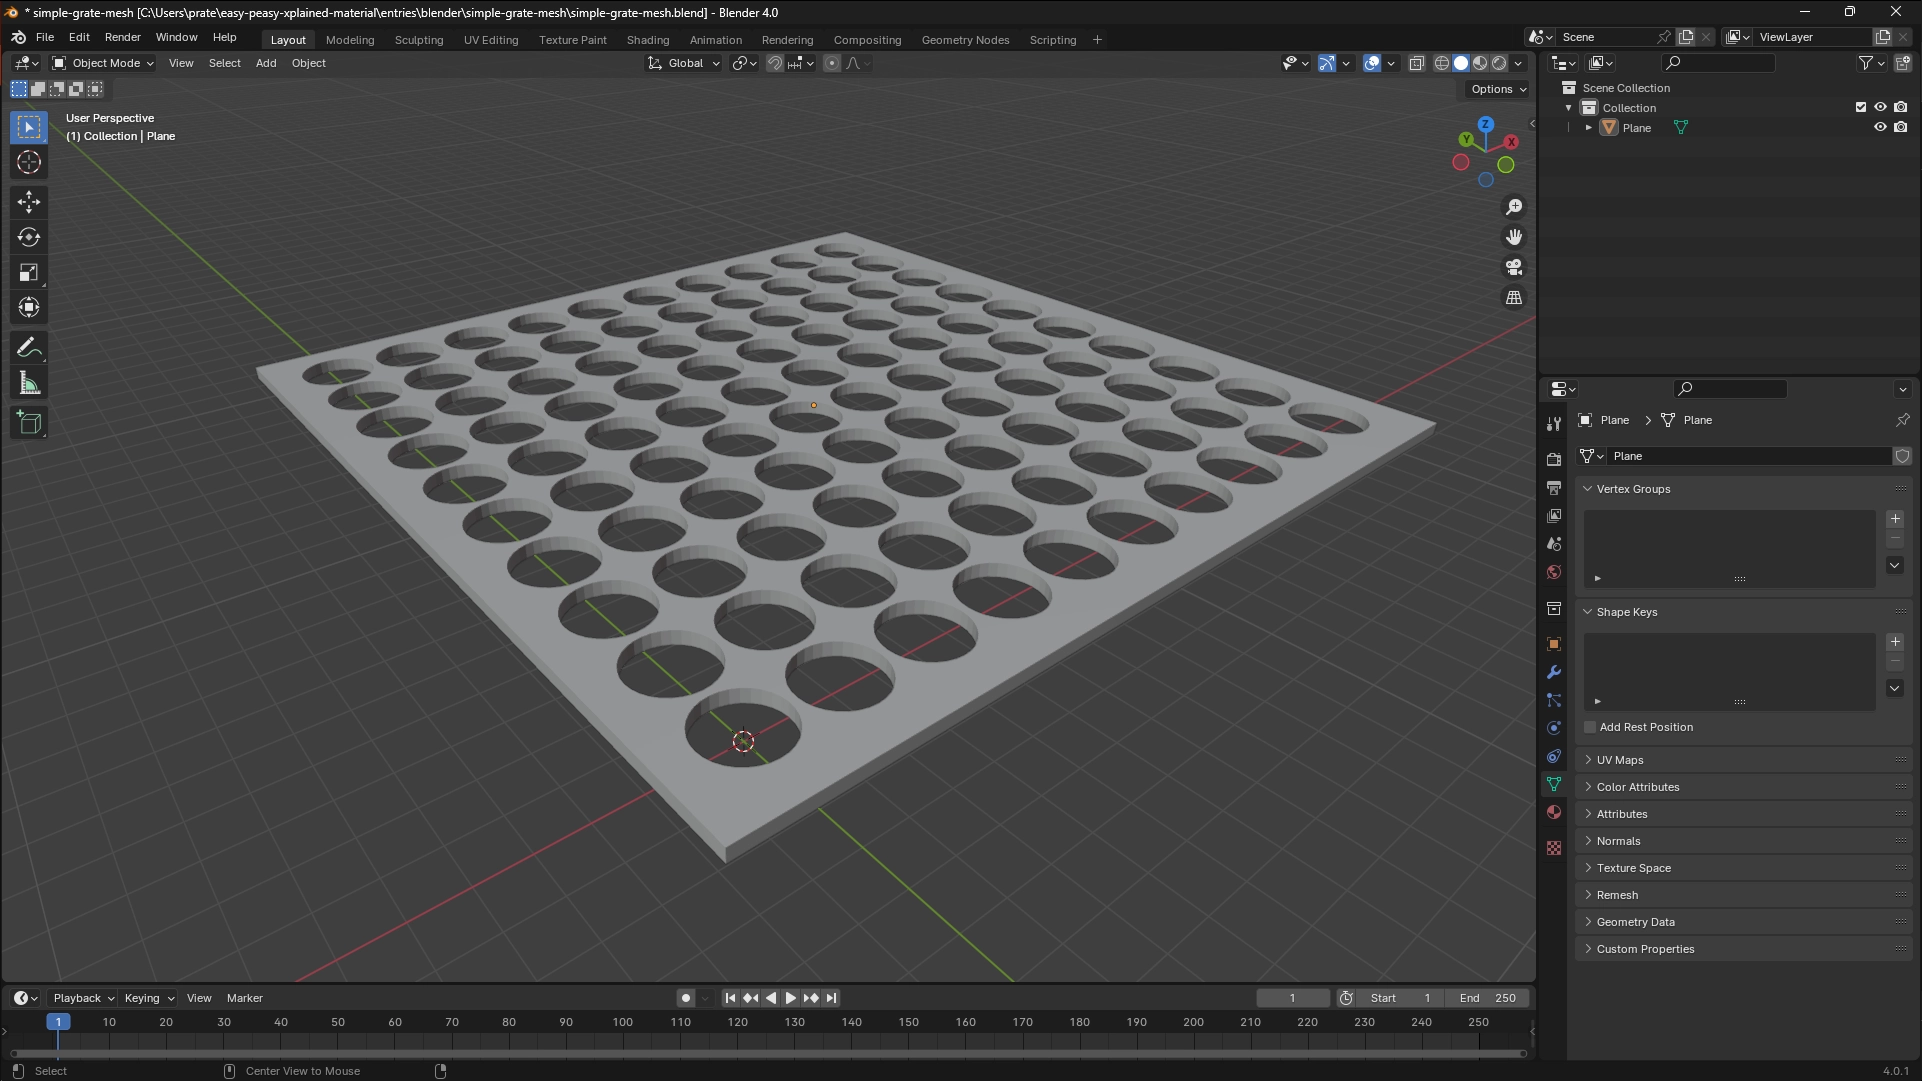
Final 3D Model
So how to do it? Here’s the step by step instructions, so just follow along 😊.
Steps to create a 3D grate/mesh model in Blender
Step 1: Add a Cylinder
I’m pretty sure everyone knows how to add a cylinder, so just go ahead and add one.
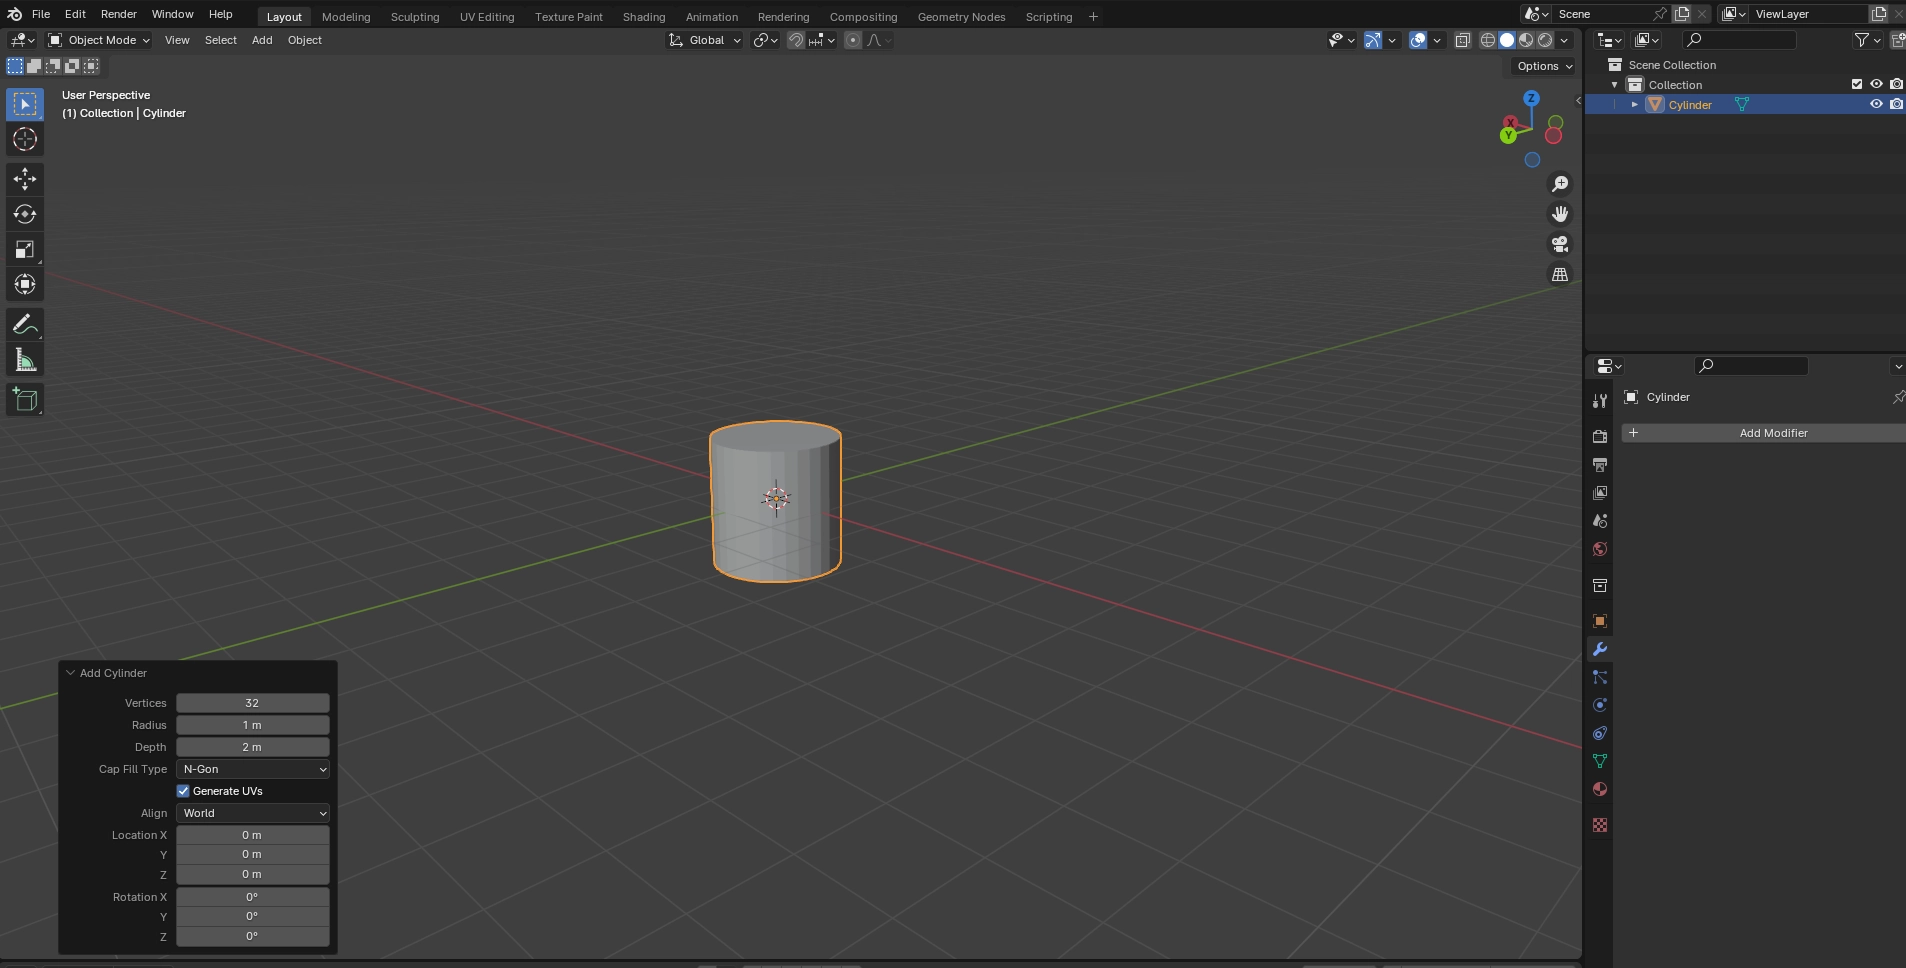
Zoom In & Out using scroll wheel, Reset by double clicking
Step 2: Add Array Modifiers
Just go ahead and add modifiers as shown in the images below.
Add Array Modifier
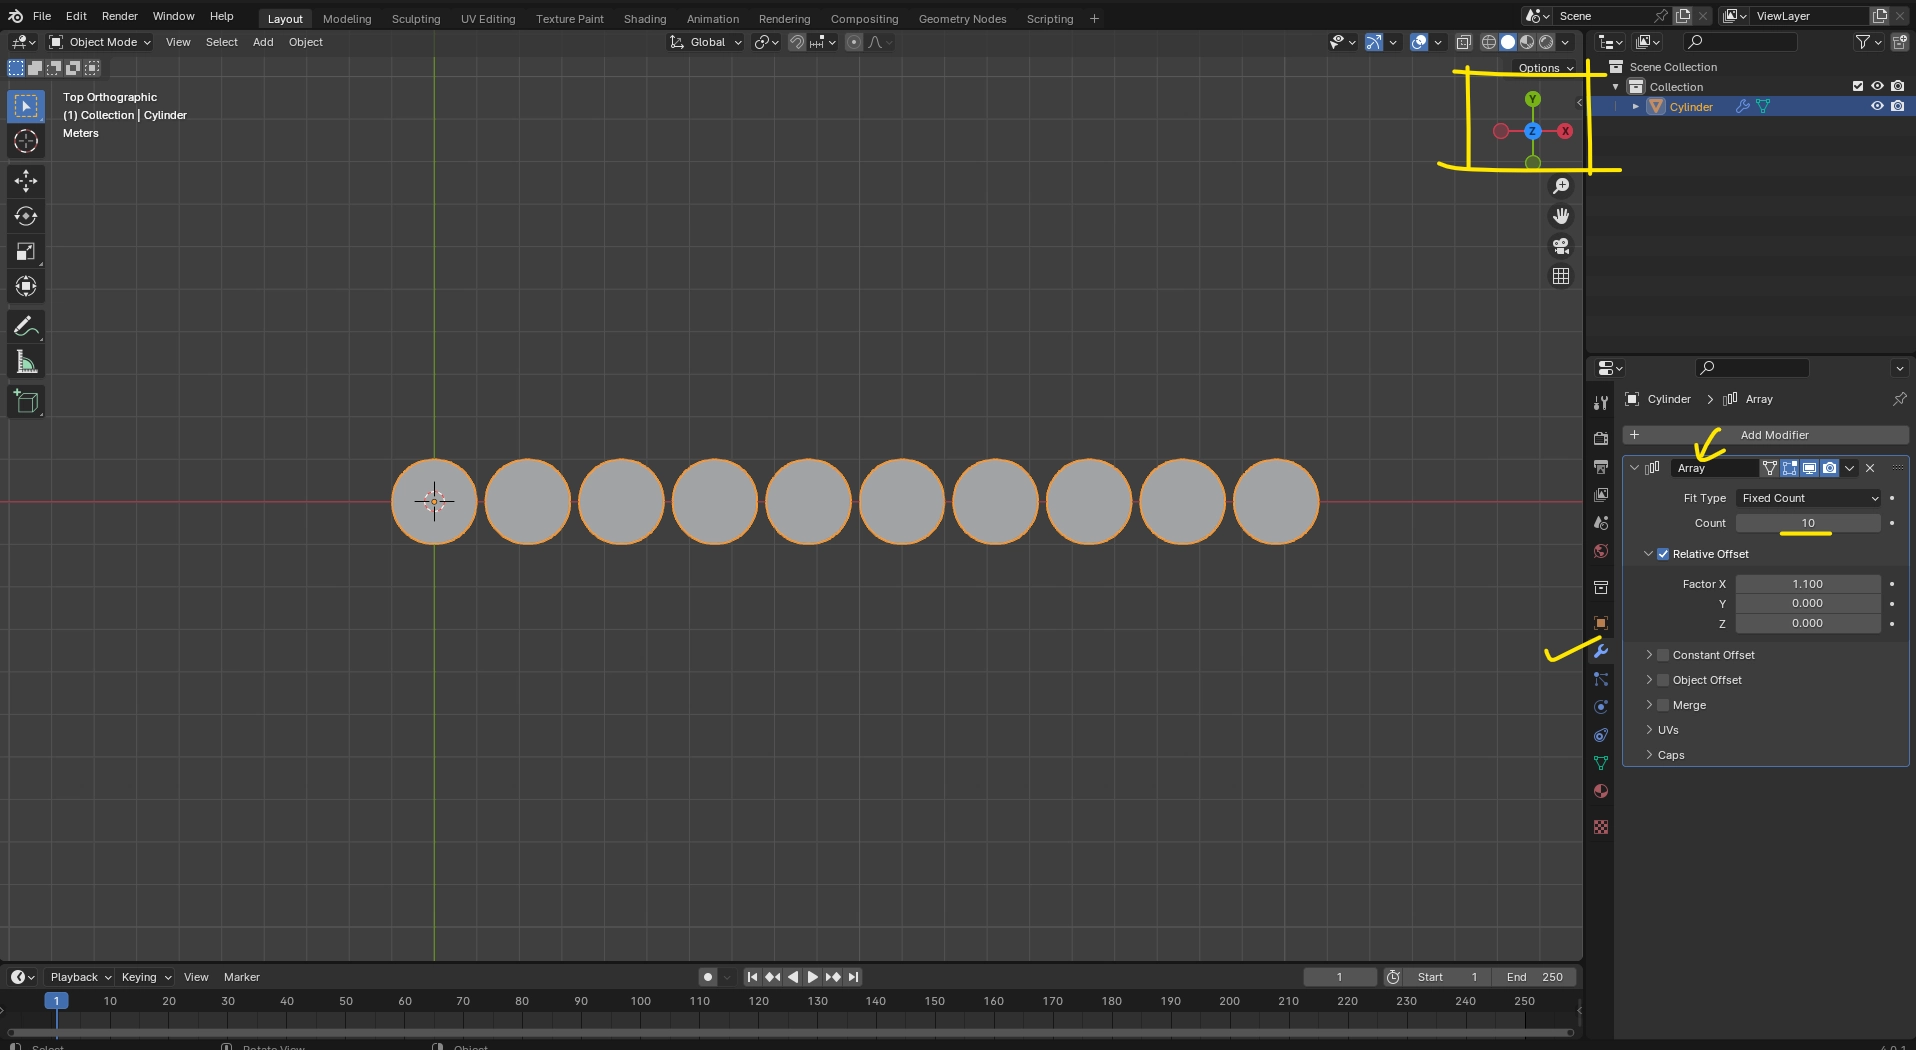
Zoom In & Out using scroll wheel, Reset by double clicking
Duplicate the array modifier
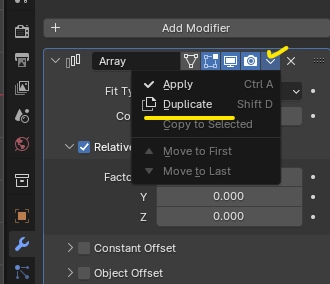
Modify these values as shown in the image below
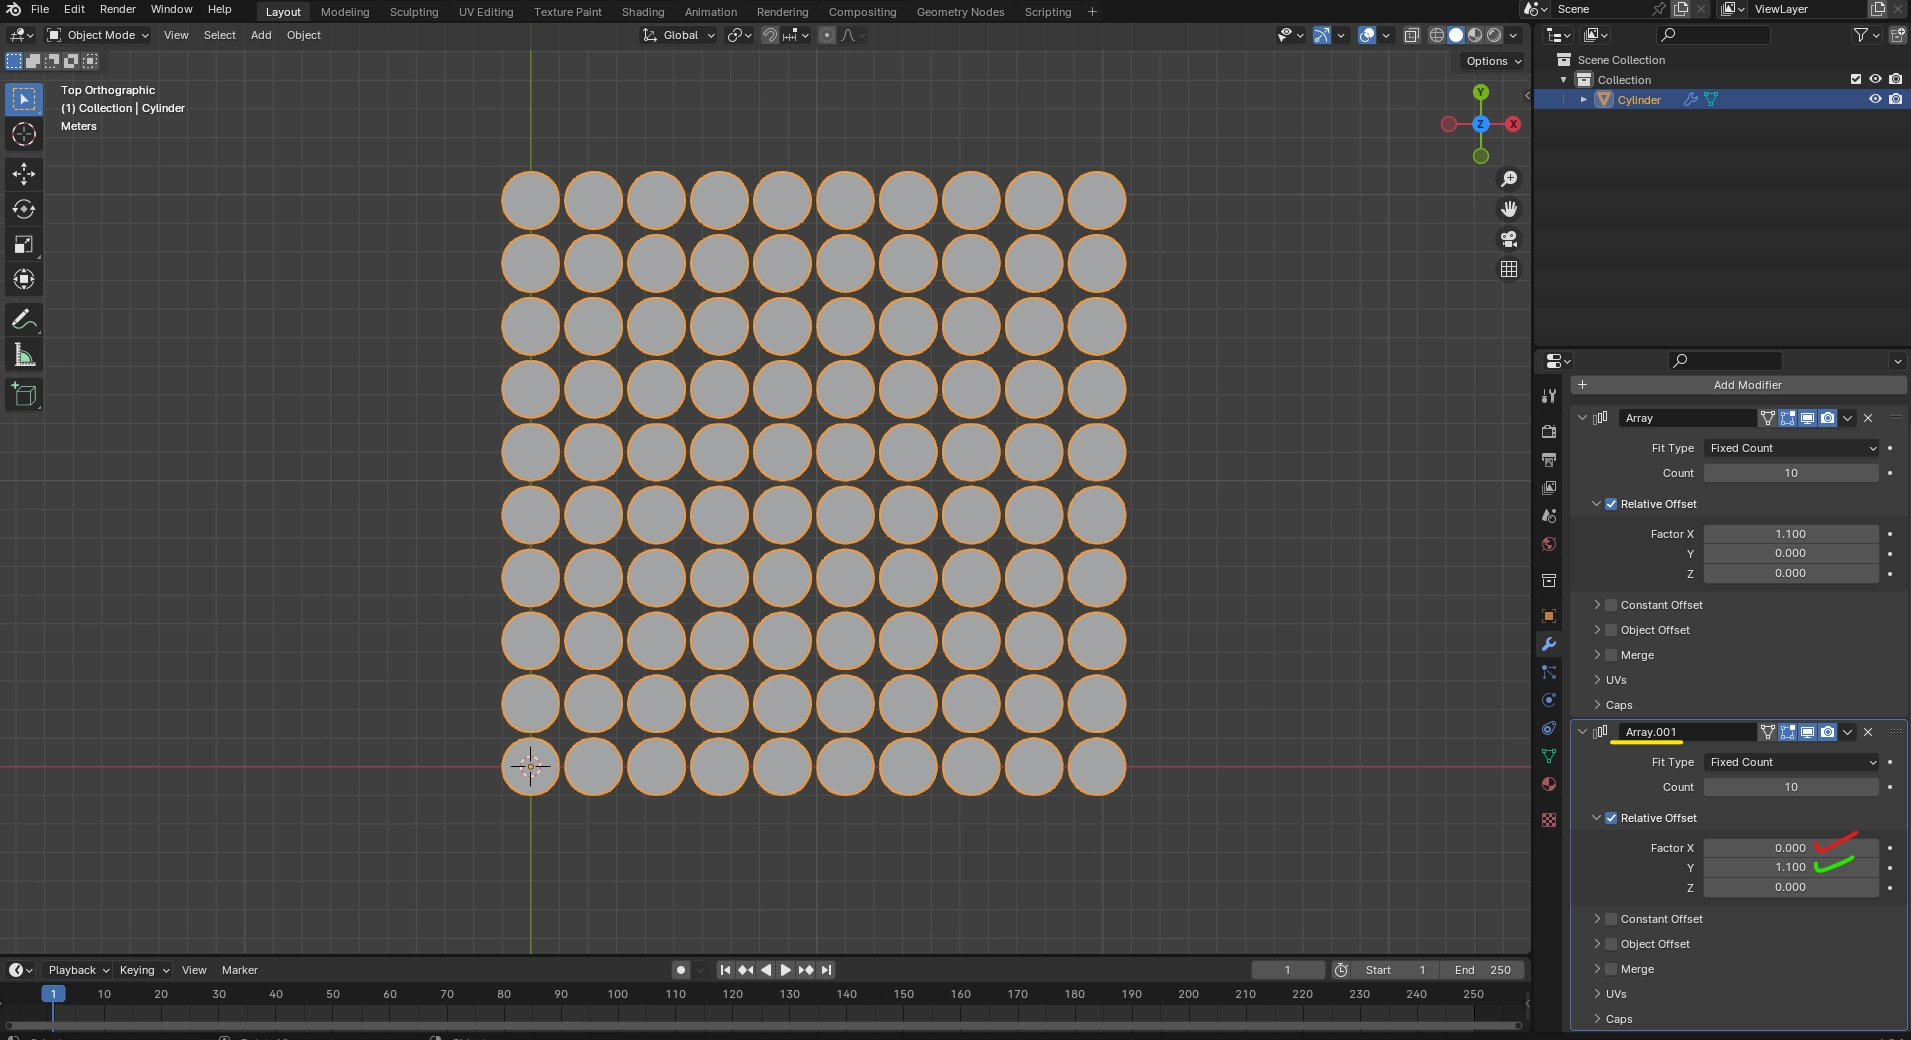
Zoom In & Out using scroll wheel, Reset by double clicking
Step 3: Add a Plane
Now add a plane and position it as shown in the image below.
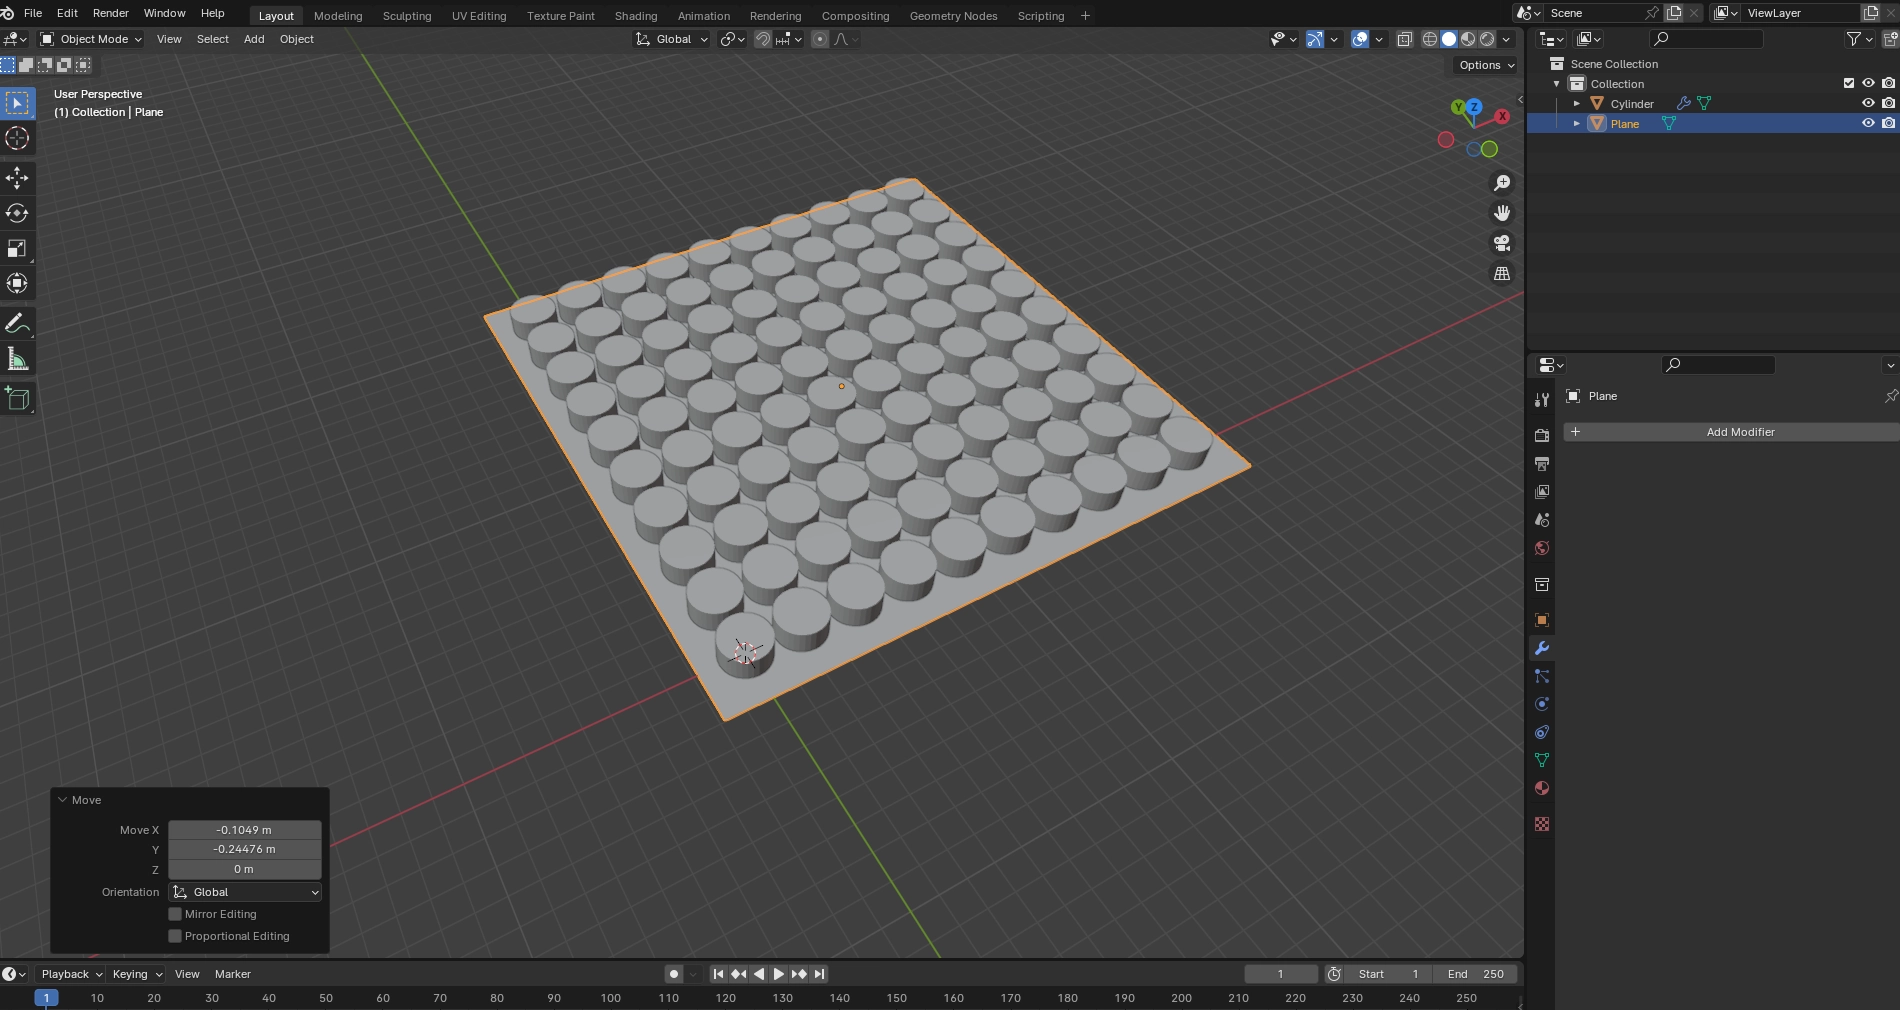
Zoom In & Out using scroll wheel, Reset by double clicking
In the edit mode add some thickness to the plane by extruding it.
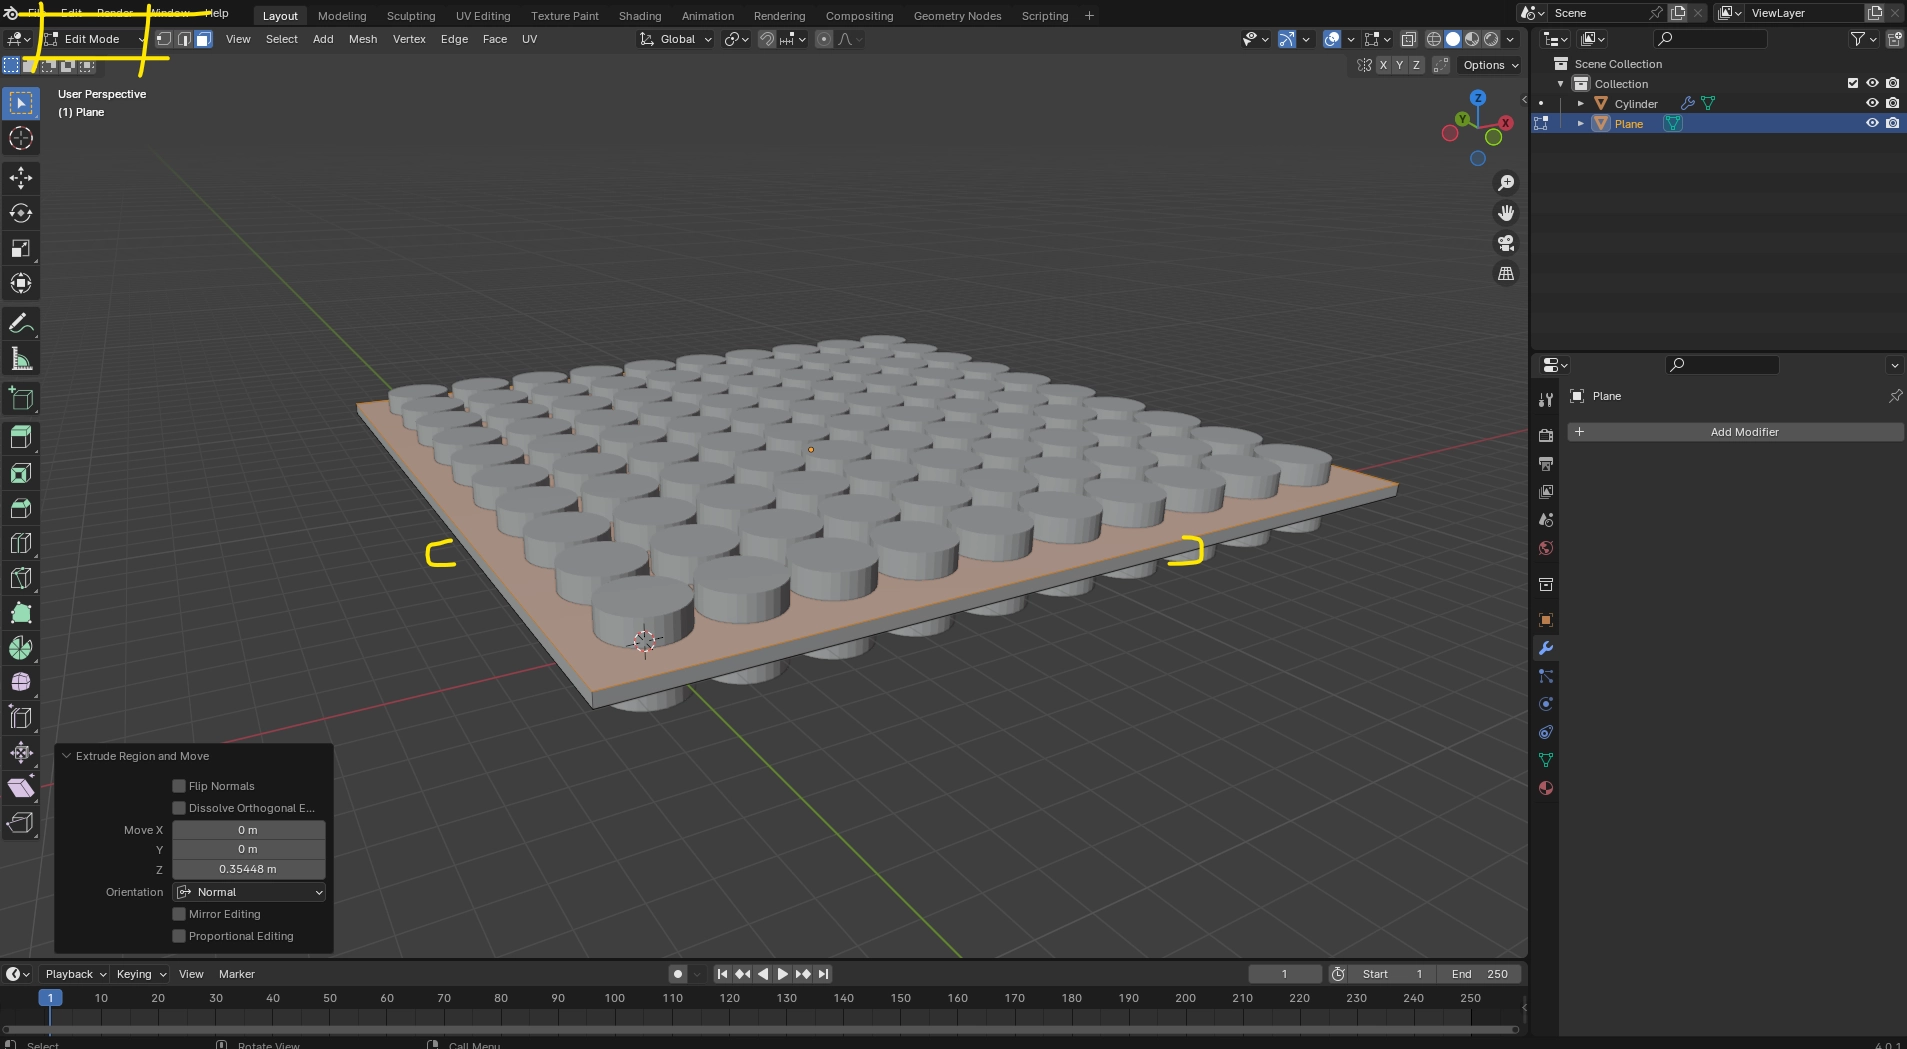
Zoom In & Out using scroll wheel, Reset by double clicking
Step 4: Add a Boolean Modifier
Now add a boolean modifier to the plane and set the cylinder as the object as shown in the two images below.
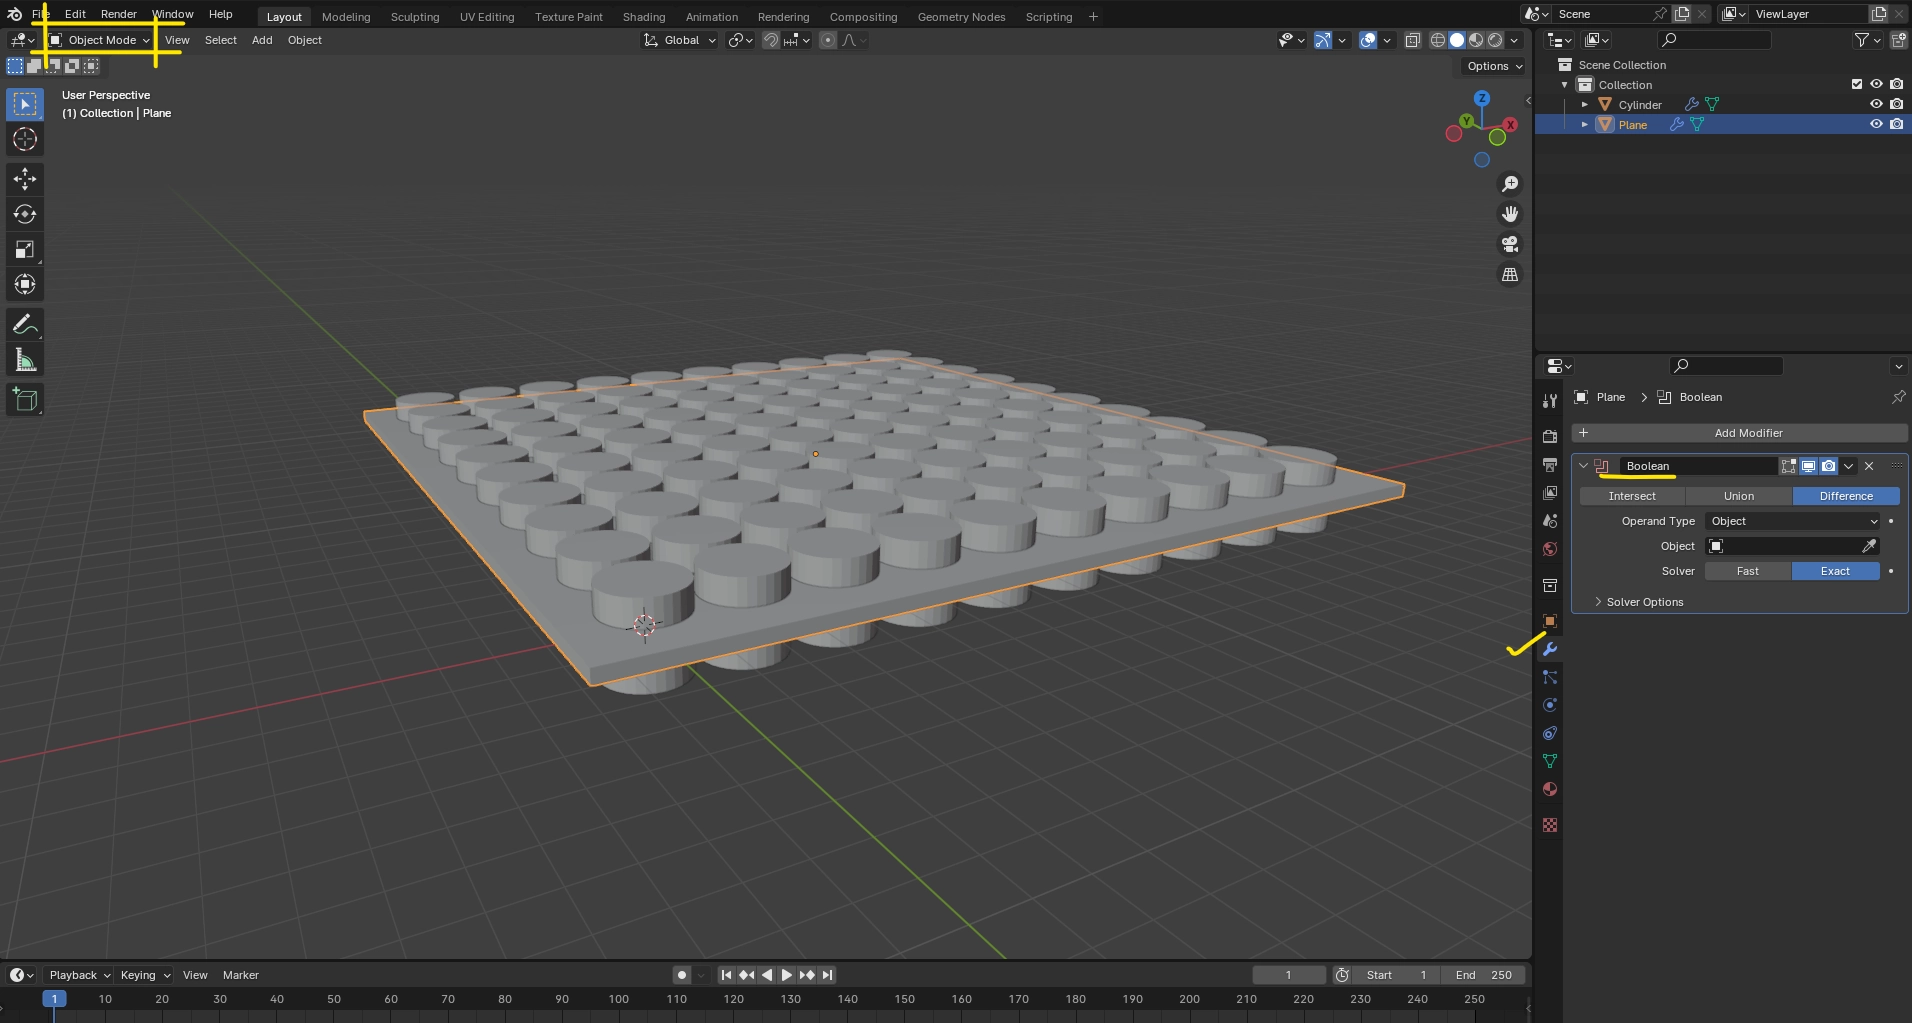
Zoom In & Out using scroll wheel, Reset by double clicking
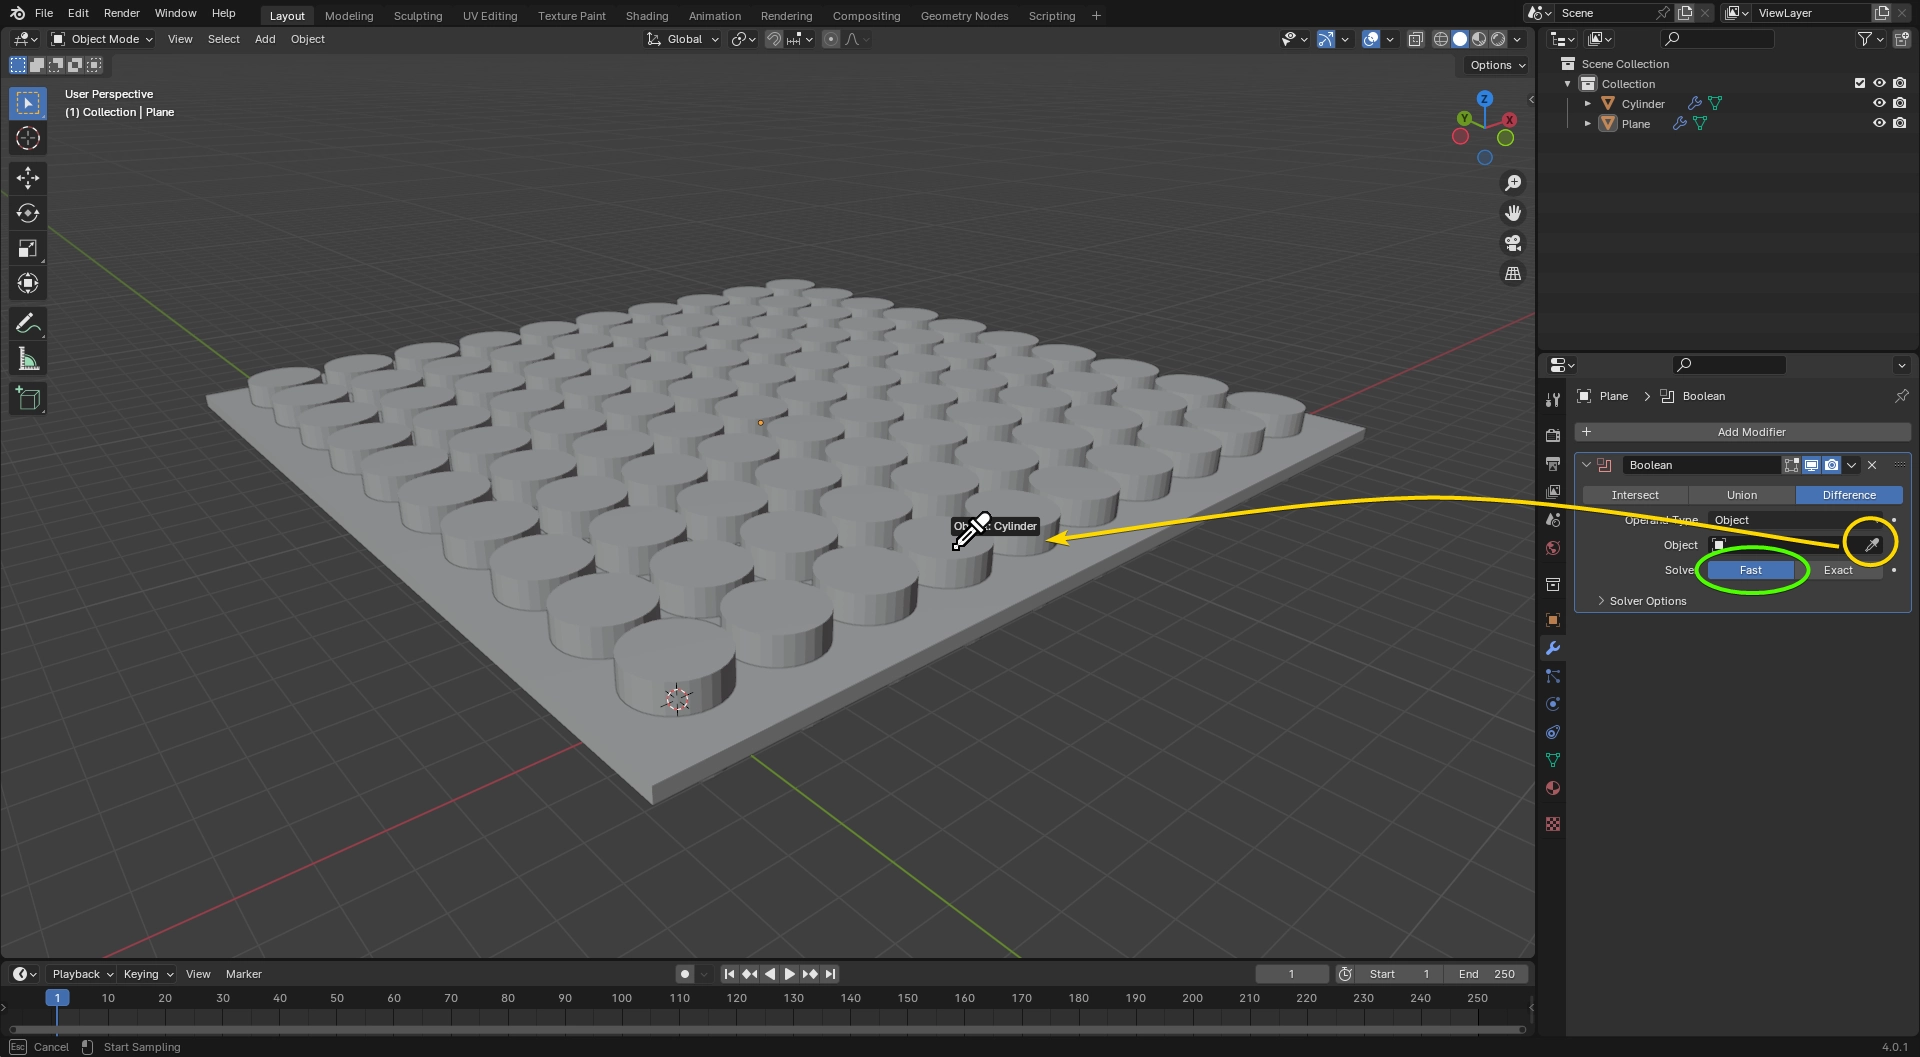
Zoom In & Out using scroll wheel, Reset by double clicking
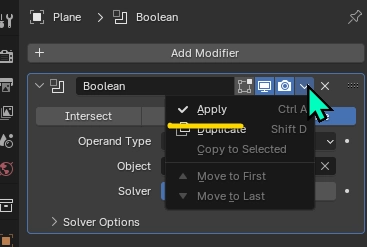
Now all you have to do is to apply the boolean modifier and you’re done.
That’s it!, thanks 🤗 for reading all the way till down here